From the Garage
Wood Flag Star Stencil: Size, Placement & Painting Tips
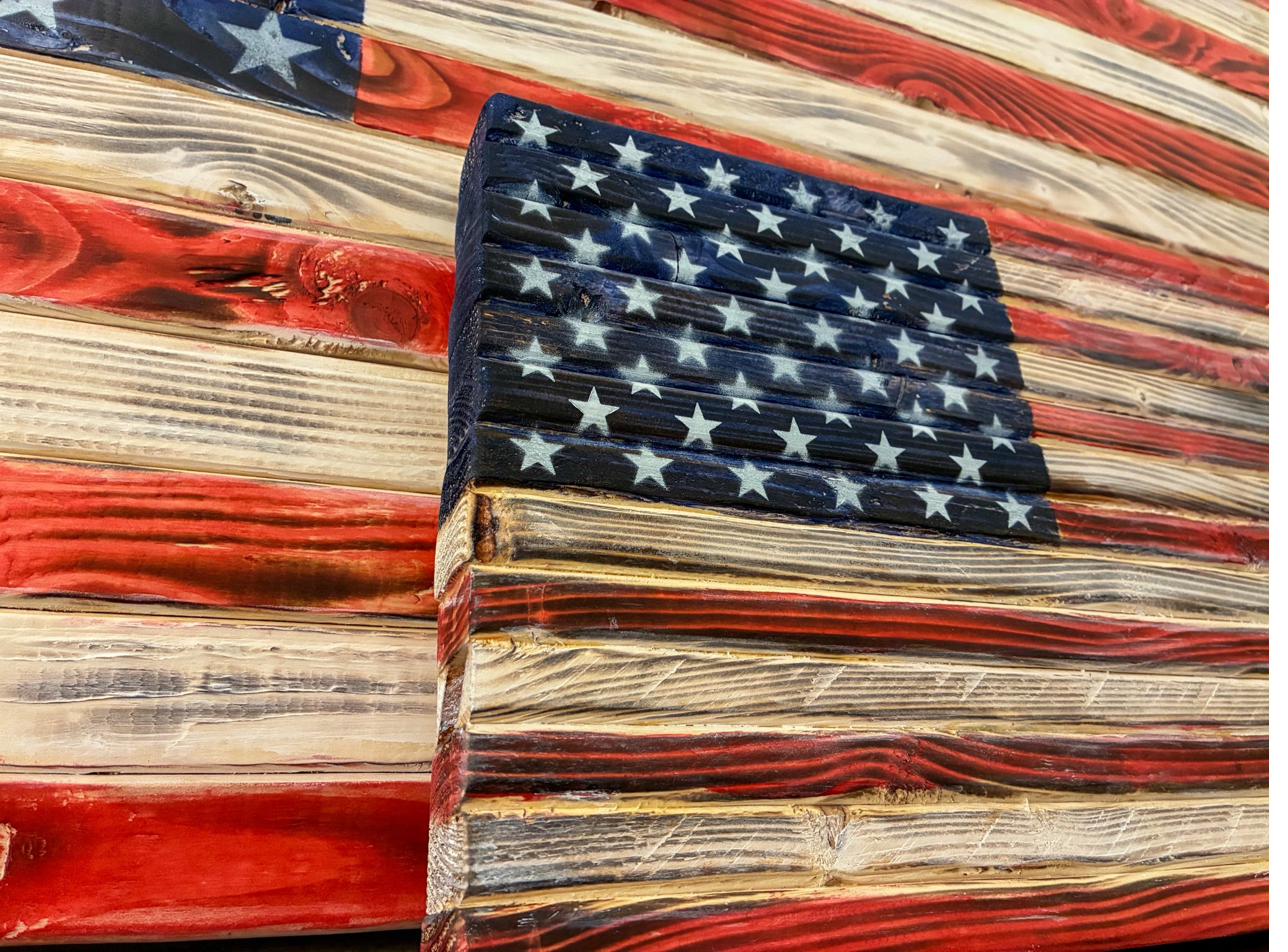
The stars are the last step on a wood flag, and they're the one that makes people nervous — one heavy spray pass and you've got fuzzy, bleeding stars on an otherwise clean flag. Get the stencil sized and placed right, though, and this step is quick and forgiving. Here's how I do it.
If you're building from scratch, start with how to build a wood American flag and how to stain it first — the stars go on after the blue canton is fully dry.
Where the Stars Go
The star field — the canton — sits in the upper-left corner, covering the height of the top 7 stripes and roughly the left 40% of the flag's width. Every star lives inside that blue rectangle. For the full proportions, see wood American flag dimensions.
Sizing the Stencil
A real U.S. flag has 50 stars in 9 rows — five rows of six stars alternating with four rows of five. You've got two easy options:
- A one-piece 50-star stencil — cut for the whole canton. Fastest and most accurate; just size it to your blue field.
- A single-star stencil — you reposition it star by star. More work, but cheap and flexible for any size flag.
Whichever you use, size the stars so they fill the canton with even margins — not crammed to the edges, not lost in the middle. On a 3-foot flag the stars end up small but distinct; on a mini they shrink with everything else.
Placement, Step by Step
- Make sure the blue is bone dry. Spraying white over tacky blue will muddy both.
- Center the stencil over the canton with equal margins top, bottom, and sides.
- Tape it down flat. Any gap between stencil and wood is where paint sneaks under. Press the edges down, especially over the raised stripe seams.
Spraying Crisp Stars
- Hold the can back — 8 to 10 inches — and keep it moving.
- Two or three light coats, not one heavy one. Light coats are the whole secret to crisp edges; heavy coats pool and bleed.
- Let each coat flash off for a minute before the next.
- Lift the stencil straight up when the last coat is tacked — never drag it sideways, or you'll smear the points.
Common Star Mistakes
- Spraying too heavy — the #1 cause of fuzzy stars. Light passes only.
- A stencil that isn't taped flat — paint creeps under the lifted edges.
- Wet blue underneath — always let the canton fully dry first.
- Dragging the stencil off — lift straight up, every time.
Want My Full Build Plan — Free?
The star stencil is one step of the whole process. My free printable build plan has the cut list, the blue field dimensions, and the build steps for a standard 36 × 19.5-inch flag. For any other size, the free star layout tool draws your star field.
Get the Free Build Plan →Frequently Asked Questions
How big should the star stencil be on a wood flag?
Size it to the canton — the blue field covers the top 7 stripes and about the left 40% of the flag's width. The 50 stars should fill that rectangle in the 9-row pattern with even margins around the edges.
What is the star pattern on an American flag?
50 stars in 9 offset rows — five rows of 6 stars alternating with four rows of 5 stars. A pre-cut 50-star stencil handles the spacing for you.
How do I keep the spray paint from bleeding under the stencil?
Tape the stencil down flat, hold the can back, and spray two or three light coats instead of one heavy pass. Light coats and a flat stencil are what give you crisp star edges.
Should I paint or use vinyl stars?
Spray paint through a stencil gives a hand-painted look that matches a rustic wood flag. Adhesive vinyl stars work too, but can lift over time and read less handmade.
Rather Skip the Stencil?
If you'd rather have the whole thing built for you — stars and all — I make each flag by hand in Trussville, Alabama, in two sizes (3-foot $349 / 17-inch $199), shipped free.
Building One Yourself?
The $25 DIY Kit includes separate guides for the standard 3-foot and 17-inch flags, matching 50-star SVG files, letter-size printable templates for both sizes, and a two-page 24×36 copy-shop PDF. Choose the page for your flag and print at Actual Size. The guides explain the two different build methods and the standard-kit measurements; custom-size tool layouts are a separate path.
See the DIY Kit — $25 →Building a different size? The Custom-Size Kit ($29) is drawn to your exact dimensions. Just getting started? The free build plan is yours.